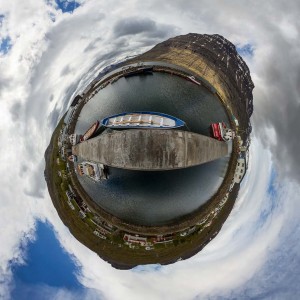
This image is a reprojected version of the panorama Standing at the Harpa in Reykjavík (Iceland). The projection is “stereographic down”.

This is the blog of the PanoTwins
This image is a reprojected version of the panorama Standing at the Harpa in Reykjavík (Iceland). The projection is “stereographic down”.

This image is a reprojected version of the panorama Standing at the Blue Lagoon (Iceland). The projection is “stereographic down”.

This image is a reprojected version of the panorama In the harbour of Eskifjörður (Iceland). The projection is “stereographic down”.

This image is a reprojected version of the panorama Standing at geysir Strokkur (Iceland). The projection is “stereographic down”.

This image is a reprojected version of the panorama Standing at Gullfoss (Iceland). The projection is “transverse mercator”.

This image is a reprojected version of the panorama Standing at Öxarárfoss, a waterfall in Þingvellir national park (Iceland). The projection is “stereographic down”.

In a previous article I already described how to post-process images which were taken with ultra wide legacy lenses on a Sony NEX in order to eliminate the magenta cast in the corners. I use the free software cornerfix (which is available for Mac and PC).
In order to get the best results, you should create your own lens profiles. Therefore you can follow these instructions. I recommend a flat field reference file which is based on a picture through a matted glass panel.
But as you may not have such a glass panel at hands you can also download one of my profiles and give it a try.
If the profiles work for you, then please leave a comment or send a note.
Markus already wrote two articles about controlling the NEX-5 with a wireless remote control. The first article presented the code and the schematics. In the second article he wrote about the final ‘product’, a boxed version of his Arduino.
Inspired by his design I tried to reduce the size. Therefore I didn’t implement the infrared receiver part and I also used a Arduino Nano instead of a regular Arduino. And I also used a smaller radio receiver. I finally had these components.


The next image shows a detailed view of the guts inside the box. With all the connecting cables and the two circuit boards there is not much space left.

The next images are showing the final setup. The trigger is attached to the camera. The controler box is connected to the trigger. The radio transmitter is ready to fire.


The following image shows a detail of the mounted trigger on the Sony NEX-7. I used some florist wire to attach the circuit board to the connector of the hand strap. On the other side the circuit board is glued to an hotshoe adapter which connects to the hotshoe of the camera.

And finally some images of the complete panorama setup, including a custom made lens bracket (in fact it’s a simple pipe clamp from the hardware store), a Novoflex Alpha- to E-Mount adapter and a Sigma 8mm/4.0 fisheye. For panoramic photography this setup is used on top of a double-monopod construction.
The weigtht of the shown setup is 1145 g (2 lb 8 oz). My old setup (Sony Alpha 900 with shaved Sigma 10mm/2.8) has 1710 g (3 lb 12 oz). In both cases this includes camera, lens, adapter, bracket, trigger, controller box, batteries and memory card.
Both setups delivers equirectangulars with the same size (10.000 x 5.000) and with both setups I shoot 4 around and mostly no up and no down shot.


And here is the new setup in action.

Click here to view some panoramic images which were taken with this setup.
The original footage has been taken from a Full- HD movie. I exported some frames of the film to individual images and used Photoshop CS6 to create this cinemagraph (in fact it’s an animated GIF image).

Lessons learned: Use a tripod!
As I didn’t use a tripod in the shoot, I had to align each of the images to minimize the movement between frames.
This image also shows a reprojected image of the panorama Inside Hallgrímskirkja (Reykjavík, Iceland). The projection is “transverse mercator”.

 Show on map