Hallgrímskirkja is a church in Reykjavík (Iceland). It is the largest church of the island. It is also the second tallest building in Iceland.
 Show on map
This is the blog of the PanoTwins
Hallgrímskirkja is a church in Reykjavík (Iceland). It is the largest church of the island. It is also the second tallest building in Iceland.
 Show on map
This image shows a reprojected image of the panorama Construction site of the European Central Bank. The projection is “stereographic down”.

 Show on map
This weekend I built my remote control for my Sony NEX-7. So I was finally able to do a pole shot with this camera. This is the resulting panorama.
Construction site of the European Central Bank
 Show on map
This image shows a reprojected image of the panorama Heini Klopfer ski jump (at the base). The projection is “transcverse mercator”.

 Show on map
This image shows a reprojected image of the panorama Heini Klopfer ski jump (at the base). The projection is “stereographic down”.

 Show on map
This image shows a reprojected image of the panorama In the Breitachklamm. The projection is “transverse mercator”.

 Show on map
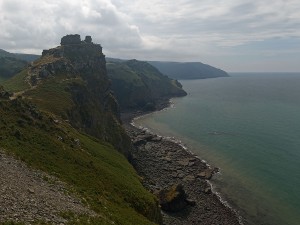
Yesterday I presented a somewhat older panoramic image from 2006. Usually I don’t need that much time to reach a result which matches my vision. My standard workflow for panoramic images starts with loading all the files in the raw converter. I choose a common white balance for all images and unify exposure, shadows, and other parameters which have to be identical among every source image. After stitching I got the following result:

I was really disappointed. In my imagination the view just was stunning. But what I saw on the screen was really dull and boring. I tried to achieve a better result with adding masks and doing some dodging and burning, but I didn’t reach my goal of a spectacular image. So I left the files on the harddisk and they were buried in oblivion.
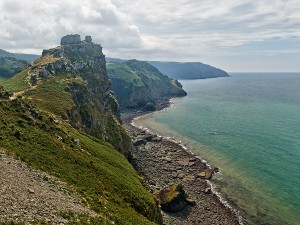
Recently I purchased Olonoe Photo Engine in order to use it for my high dynamic range workflow of spherical panoramas. Independently of that fact, I was recently crawling through the sphericals of our website and I stumbled upon the panorama PanoTwin Jürgen shooting Castle Rock. So I browsed my database for the images and found the long forgotten files of Castle Rock on my hardddisk. Immediately I realised that this image is a good candidate for the mode ‘raw recovery’ of Olonoe Photo Engine. So here is the result after playing a bit with the parameters:

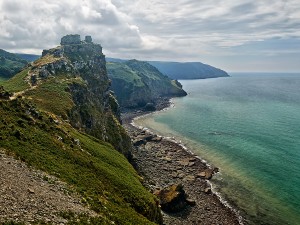
So I choose the ‘raw recovered’ image as new base image of my tweaks. Again I applied some dodging and burning, but now the image matched my vision when I was standing at the coast of Lynton and looking towards Castle Rock. And this is the final result:

As Olonoe Photo Engine is capable of processing TIFF images with a bit depth of 16bit, be sure to start your panoramic imagery with images in RAW mode of your camera. And for best results stick to a full 16bit workflow.
 Show on map
Nearly six years ago we’ve been at the Panotools-Meeting in Bath. After the sessions we toured the south-west of England four another two weeks. And while taking a little hike near Lynton I took this panorama. And finally today I consider this image as completely post-processed 🙂

Panotwin Markus made a spherical while I was shooting a mosaic of this view. Back in 2006 I used a Konica Minolta Dynax 7D which had 6 Megapixel. As the shot was hand-held and I wanted to make sure not to forget some portions of the view, I chose an overlap of approximately 50%. So I ended up with 20 images (4 columns with 5 rows in landscape orientation). The final panorama has a resolution of only 42 Megapixel. But hey, this was nearly six years ago!
 Show on map
In a post from yesterday I analyzed a series of images from the Voigtländer Ultra Wide Heliar 12mm/5.6 on my Sony NEX-7 in order to identify the best aperture for maximum resolution. I wondered about the impact of my corrections at the stage of post-processing the images. To answer this question I picked the image taken with an aperture of f=8 and compare a uncorrected and a corrected version of the image.
While post-processing the uncorrected image I did the following:

While post-processing the corrected image I did the following:

For each of the marked locations in the full image I extracted a square (250 pixel * 250 pixel) which I will present at it’s original resolution. These images are not sharpened except for the same input sharpening with the raw converter. They are saved for web with a quality-setting of 60%.


In my opinion it’s clearly visible that the applied correction didn’t reduce the resolution of the image and therefore the identification of the best aperture for maximum resolution is not affected by these corrections.
Recently I started using a Voigtländer Ultra Wide Heliar 12mm/5.6 on my Sony NEX-7. In two other articles I already described how to configure your NEX-7 for maximum assistance with manual lenses, how to attach the lens to the camera and how to post-process the images to eliminate the magenta cast in the corners.
As I am aware of the fact, that any combination of lens and body has it’s maximum sharpness at a specific aperture I did a series of test images to find this maximum. My subject was the front of a building. It has a nearly flat surface and the clinker bricks contain a lot of fractal details. The camera was mounted on a tripod whose distance to the wall was approximately 15 meters (approximately 50 feet). Images were taken with self-timer to prevent any camera-shake. Focus was set at the first exposure which was taken at f=5.6. The image quality was set to RAW (6,000 pixel * 4,000 pixel).
While post-processing the images I did the following:
The following image (at f=8) was scaled to 1,500 pixel * 1,000 pixel, sharpened and saved for web with a quality-setting of 60%.

For each of the marked locations in the full image I extracted a square (250 pixel * 250 pixel) which I will present at it’s original resolution. These images are not sharpened except for the same input sharpening with the raw converter. They are saved for web with a quality-setting of 60%.


In my opinion it’s easy to see that the Voigtländer Ultra Wide Heliar 12mm/5.6 reaches it’s maximum sharpness at an aperture around 8 on a Sony NEX-7. If you stop further down diffraction starts to limit the resolution. For further reading on this issue try to start at this page at diglloyd.com.
 Show on map